A clean and well maintained sliding insect screen is not only a question of beauty, but also of health and effectiveness. Regular cleaning of the mosquito net allows it to be used for a long time and provides protection against insects. In this article we will show you step by step how to clean your Insect screen correctly.
How to clean a sliding insect screen?
Step 1 Preparation for cleaning
Before cleaning your sliding insect screen, prepare all the necessary tools and cleaning products.
You will need:
• a fine brush, a brush with soft bristles or a hoover with a soft nozzle and power control,
• lukewarm water with soap or a mild detergent,
• a soft cloth or sponge,
• dry cloth.
Step 2 Removing the insect screen
Most sliding insect screens can be easily removed. It is usually enough to push the insect screen to the extreme position and gently lift it to slide out of the guides.
Do this carefully so as not to damage the frame or the mesh itself.
Step 3: Remove loose dirt
Using a soft brush, brush or hoover with a soft tip, remove dust, dirt, dead insects and other debris from the surface of the mesh. Be sure to clean gently so as not to damage the insect screen. If you clean the net with a hoover, remember to reduce the suction power.
Step 4: Wash the insect screen
Prepare a solution of lukewarm water and soap or a mild detergent in a bowl. Soak a soft cloth or sponge in the prepared solution and gently wipe the insect screen on both sides. Before using any detergent other than, for example, grey soap or dishwashing liquid, it is worth making sure that it is not too strong. It can dissolve the threads and cause discolouration or other blemishes.
When cleaning the insect screen, do not exert too much pressure on the mesh, as the mesh can become deformed or even damaged.
Step 5 - Rinsing and drying
After cleaning the insect screen, rinse it with clean water to remove any remaining detergent. You can use a garden hose or a shower. Then dry the insect screen with a dry cloth. Make sure that the insect screen is completely dry before mounting it again.
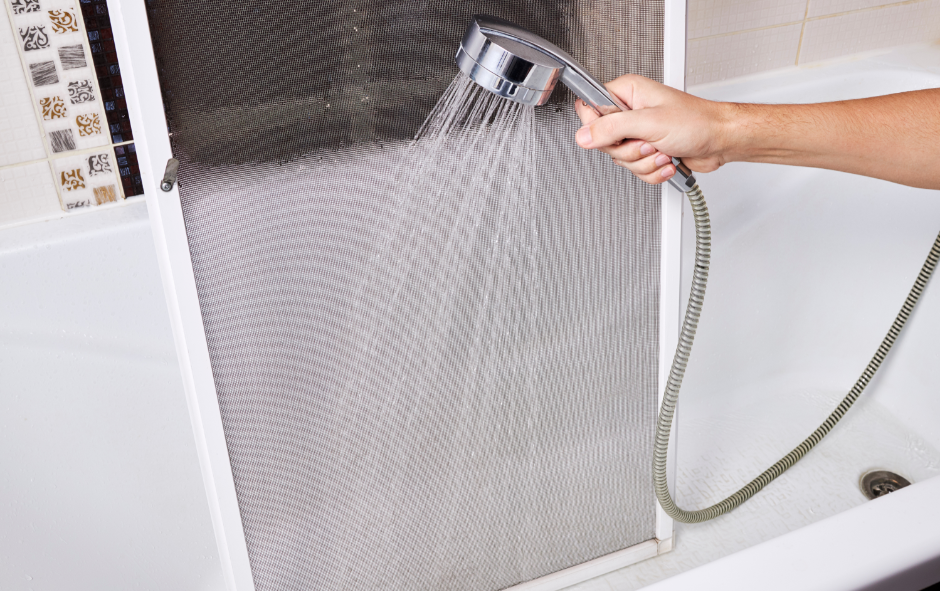
rising insect screen
Step 6: Assembling the insect screen.
Once the insect screen is dry, assemble it back in place. Make sure it is well seated in the guides and works smoothly.
Regular cleaning of insect screens is the basis for their longevity.
For more frequent care use a hoover with adjustable power or a soft brush. Gently remove dirt from the surface of the insect screen, vacuuming it from both sides if possible. Remember to always clean the insect screen from top to bottom.
The more often you clean it, the less often you will have to completely dismantle it for a thorough cleaning. Make cleaning your insect screens part of your daily routine to keep them looking fresh for longer.
Remember to always clean the mosquito net from top to bottom.
Sliding insect screens at Aikon Distribution
At Aikon Distribution you'll find a wide range of mosquito nets, including sliding insect screens to suit your window.
Check out our range of sliding insect screens:
Może Cię także zainteresować:
You do not know which insect screen to choose for your house? Ask our expert.